


The OYO160M series Refraction camera is a bit dated these days, but there are still plenty around. This page describes some basic maintenance that might keep one running for a bit longer.
Changing Floppy Disk Drives
Despite what many people would have us believe, there isn't much special about the OYO160 Floppy drives.
They are compatible with standard PC 3.5 Inch drives with one caveat - the OYO drives use address 0 whereas PC drives are always set to address 1 (Even when 2 drives are present - this is the reason for the twist seen in the cable between drive A and drive B in a PC)
So, when selecting a new drive for your OYO, select one that has jumpers that allow you to set address 0. Not all new floppy drives have this, but it is common on older drives, so just look around.
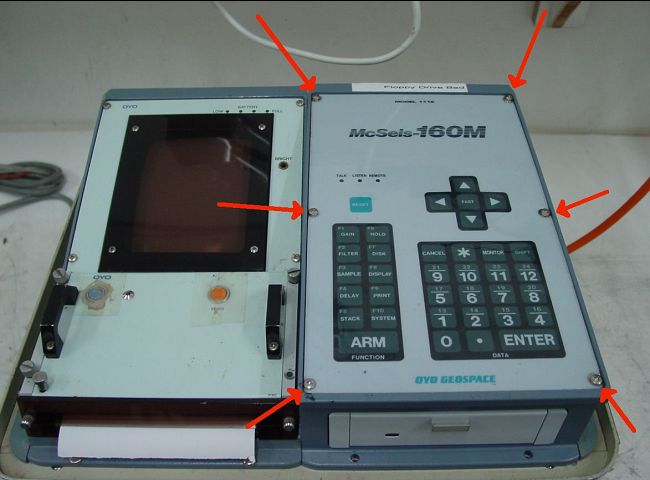
Changing the drive is fairly straightforward:
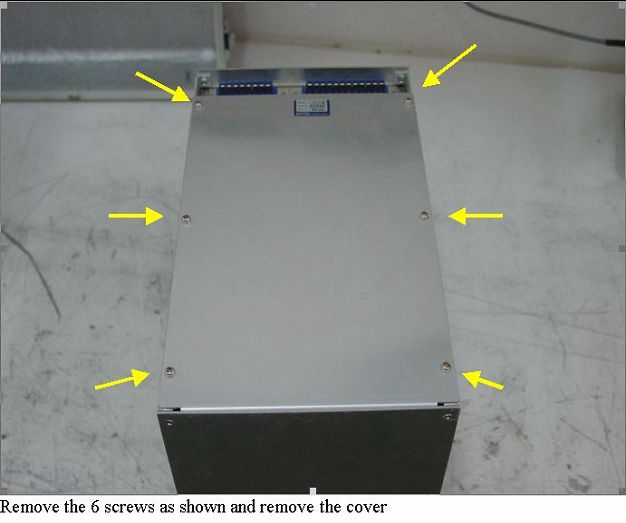
Remove the 6 screws from the front panel
Despite what many people would have us believe, there isn't much special about the OYO160 Floppy drives.
They are compatible with standard PC 3.5 Inch drives with one caveat - the OYO drives use address 0 whereas PC drives are always set to address 1 (Even when 2 drives are present - this is the reason for the twist seen in the cable between drive A and drive B in a PC)
So, when selecting a new drive for your OYO, select one that has jumpers that allow you to set address 0. Not all new floppy drives have this, but it is common on older drives, so just look around.
Changing the drive is fairly straightforward:
Remove the 6 screws from the front panel
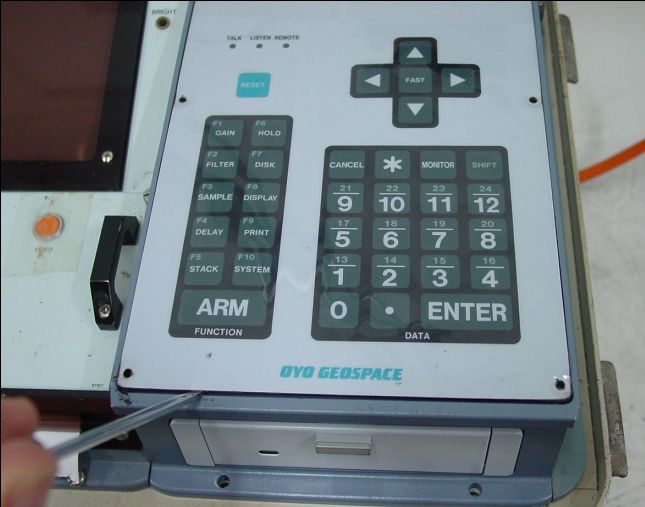
Gently use a flat blade screwdriver to lever the panel up so it can be lifted fully:
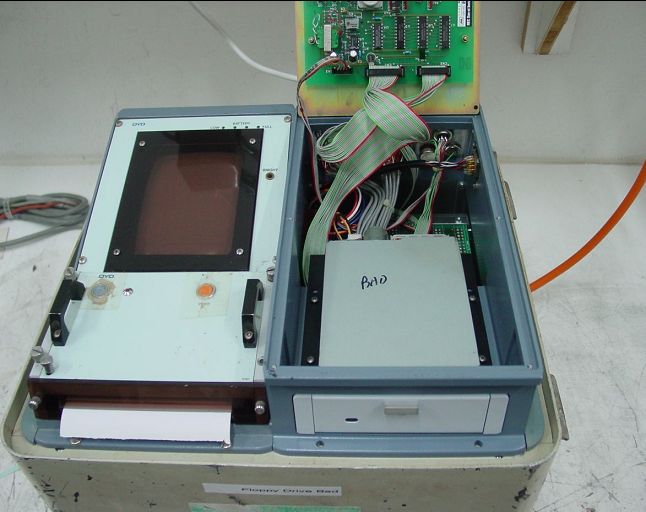
The panel can then be lifted up fully to expose the drive:
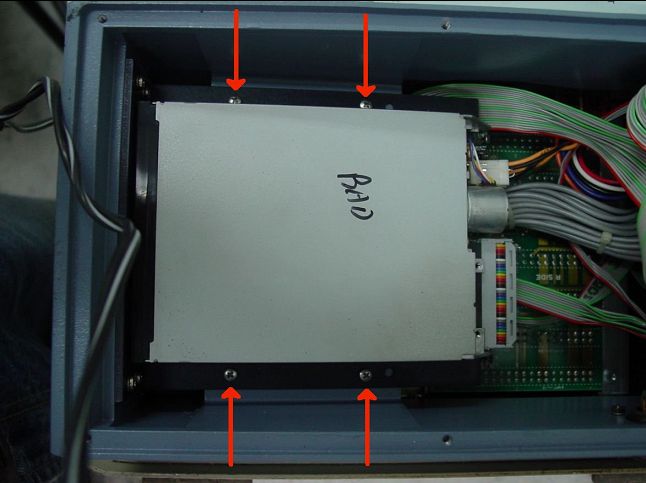
Remove the 4 screws as shown and the drive will lift out and can be replaced:
Battery Backed Memory
If the System does not keep it's settings after being powered off, it is probably due to the battery backed memory on the CPU board.
This board is located in the same module as the switch panel and floppy drive.
Remove the 4 screws that hold it in the case, pull it out and turn it over:
If the System does not keep it's settings after being powered off, it is probably due to the battery backed memory on the CPU board.
This board is located in the same module as the switch panel and floppy drive.
Remove the 4 screws that hold it in the case, pull it out and turn it over:
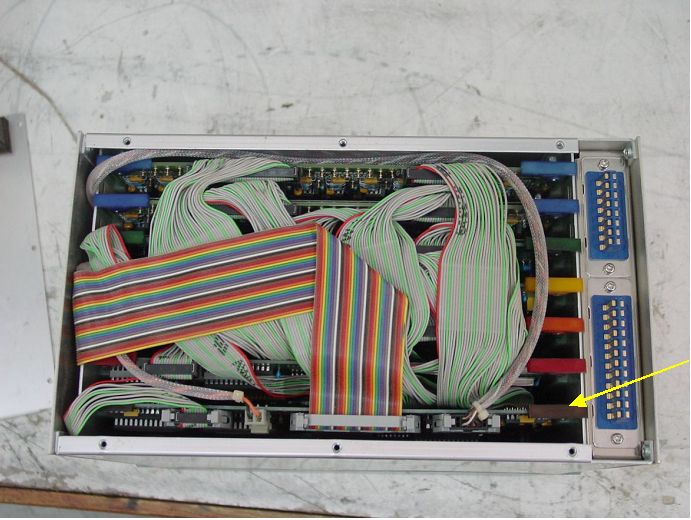
Remove the Board Indicated - it is the CPU Board
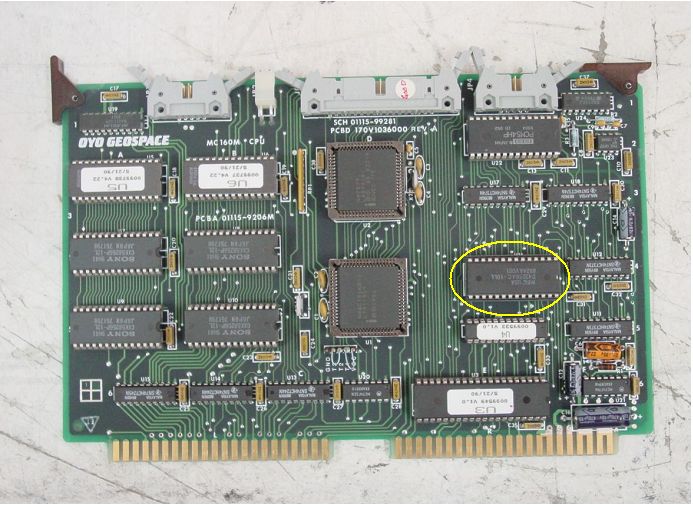
The circled chip is the backup memory. It is battery backed by DS1216C Smartwatch RAM backup socket. It is the socket that contains the batteries and DS control IC.
And it is the socket that needs to be changed. Remove the RAM chip first.
And it is the socket that needs to be changed. Remove the RAM chip first.
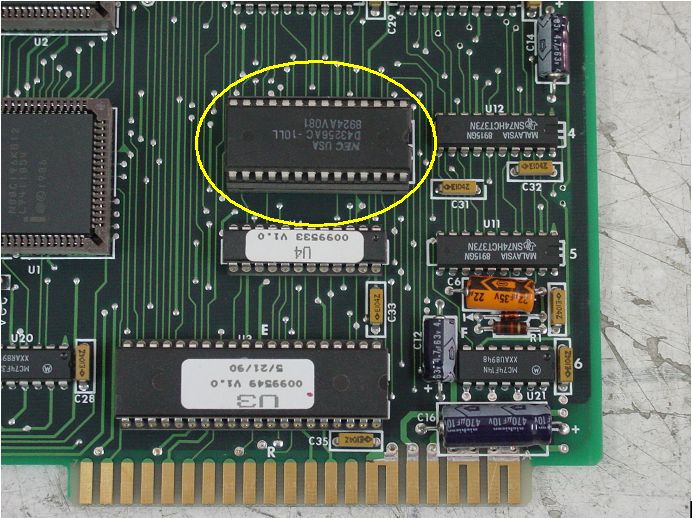
It is a prick of a thing to remove. Even with a good vacuum desoldering station it is difficult. I recommend using a high power heat gun to melt the solder on all pins from the back of the board, and let the socket fall out. You can then use normal desoldering techniques to clean the holes and install the replacement. Be careful to avoid burning the surrounding board though.
Using the McTran Software
If your floppy drive fails and you have not received a spare, then the only alternative we have is to transfer the data directly to the computer.
To do this you will need to use McTran which is a small DOS utility produced by OYO and connect to the OYO with the RS232 cable - the one with a round connector one end and a 9 pin square style DB9 connector the other end.
The pinouts are as follows:
Round 7 Pin Connector DB9F
1 --------------------------------------- 2
2 --------------------------------------- 3
3 --------------------------------------- 1
4 --------------------------------------- 1
5 --------------------------------------- 6
6 --------------------------------------- 4
7 --------------------------------------- 5
The McTran software is a bit difficult to find these days, but may be still available from OYO-Geospace if you ask nicely.

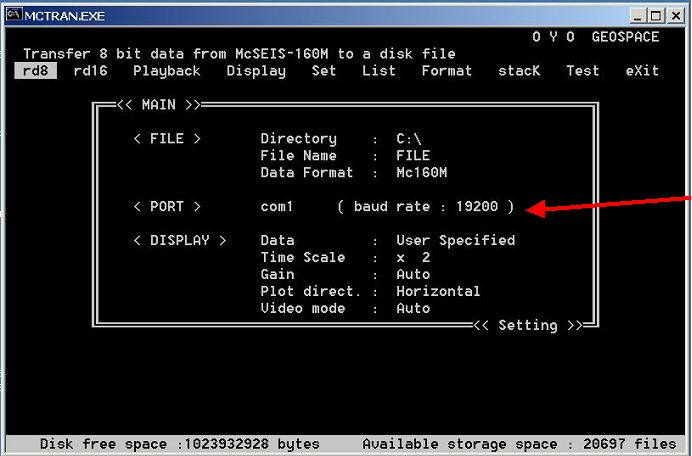
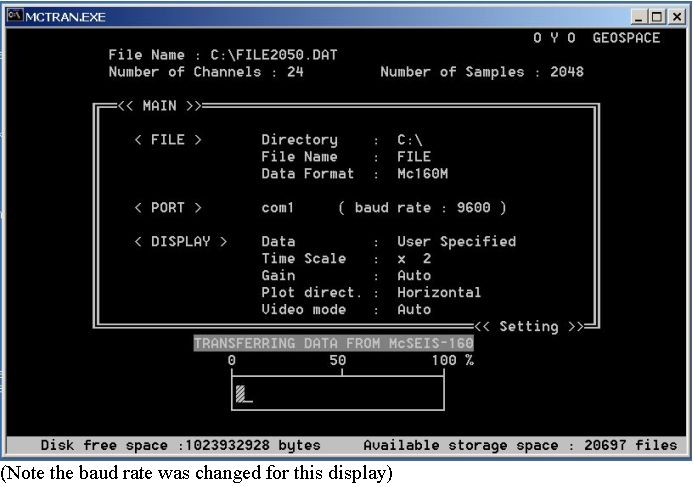
Verify the baud rate matches the OYO - 9600 or 19200:
After taking a shot, and being at the stage you normally would be for writing to disk, select "rd16" with the arrow keys and press enter
If Instead you get something like:

You will probably have to switch off the OYO and start again.
This means of course that you have lost your shot.
The important thing is to be at the stage of writing to disk for the program to work.
Practice before you need to use it!
This means of course that you have lost your shot.
The important thing is to be at the stage of writing to disk for the program to work.
Practice before you need to use it!
McTran Setup for Windows 2000
For the Mctran program to work under Windows 2000 or the horror of XP, ANSI.SYS needs to be loaded
when the program starts.
To do this, in folder c:\WINNT\system32
create a text file called ansi.nt
Make sure it is named correctly, not with .TXT
paste the following lines into the file and save it
dosonly
device=%systemroot%\system32\ansi.sys
device=%SystemRoot%\system32\himem.sys
files=40
dos=high,umb
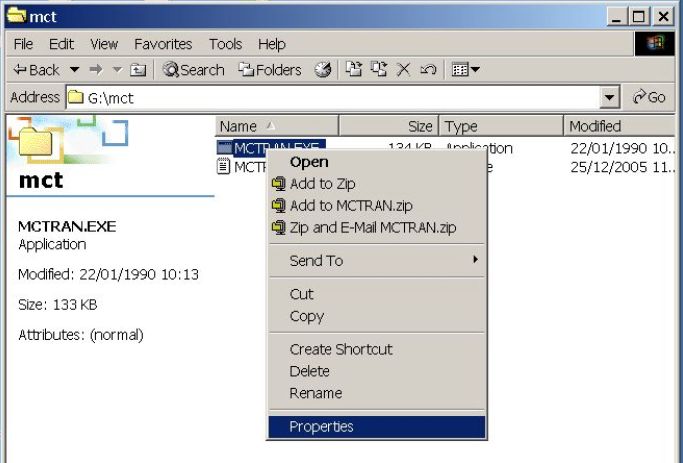
Then navigate to the folder where McTran lives.
Right click on MCTRAN.EXE -->>Properties -->>Program -->> Advanced
For the Mctran program to work under Windows 2000 or the horror of XP, ANSI.SYS needs to be loaded
when the program starts.
To do this, in folder c:\WINNT\system32
create a text file called ansi.nt
Make sure it is named correctly, not with .TXT
paste the following lines into the file and save it
dosonly
device=%systemroot%\system32\ansi.sys
device=%SystemRoot%\system32\himem.sys
files=40
dos=high,umb
Then navigate to the folder where McTran lives.
Right click on MCTRAN.EXE -->>Properties -->>Program -->> Advanced
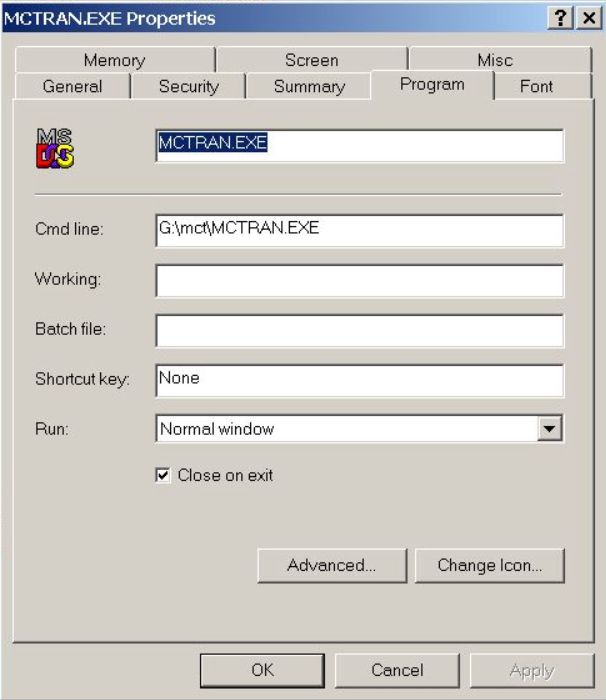
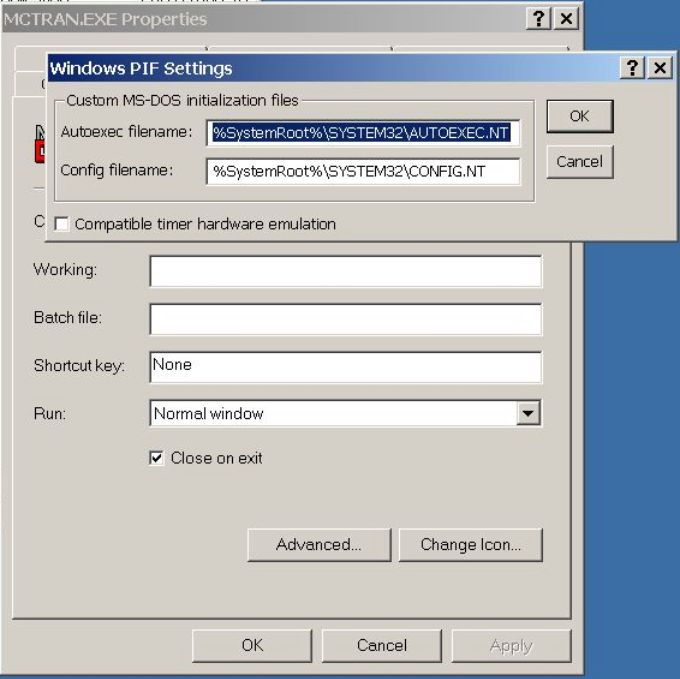
Then Change the entry for Config filename from CONFIG.NT to ansi.NT (leave the rest of the line as it is)
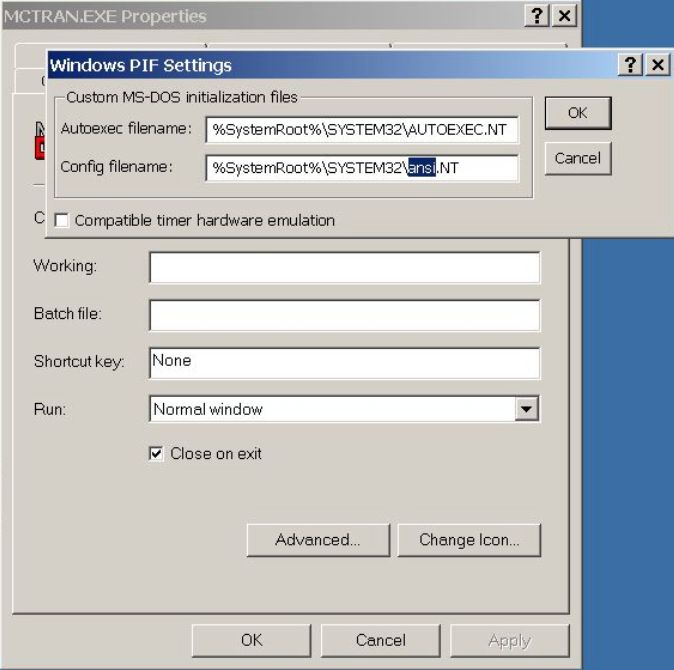
Click OK -->> OK
A new file should appear in the McTran Directory
A new file should appear in the McTran Directory
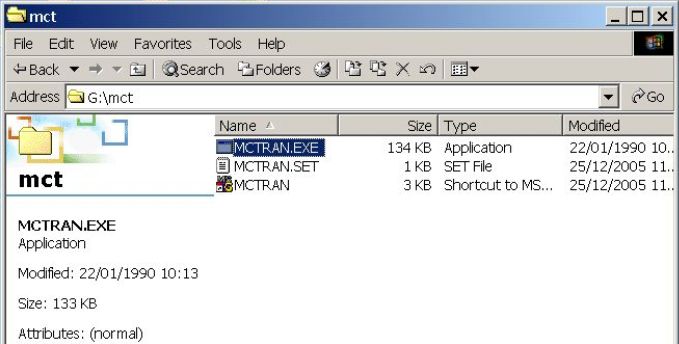
Use this to make a shortcut to McTran