


IBM B1A Tape drives
The drives must have the CU mode disabled.
Lift the control panel to access the extra buttons, you might have to bend it forward.
Press the one that looks like a spanner (or wrench in American English)
Select proceed with the arrow keys and press the enter key (the right angle arrow one)
Select Config/Install then enter
Select Drv options then enter
Scroll down to Disable CU Mode and press enter
Then scoll up to cancel and press enter
then press the left most key on the control panel the one that looks like a 'I'
The drive will reset and you can try it.
Here are notes about IBMB1A 3590 format tape drives.
In the recorder, Fujitsu M8100A are to be prefered, but Fujitsu no longer manufacture or support these. The alternatives for the Seismic industry are record to Hard disk with Seisnet or Sercel's NAS or to use surplus B1A drives.
The B1As are probably most often seen in the field processing centres rather than the recorder, as they are not suited to the rigors of the field.
IBM B1A General Maintenance
Most problems are due to dust in the sensors or Air Bearings.
If you get a FID1 Error when the drive is switched on and no tape is in it, chances are you can get the drive going by blowing out a couple of Sensors with a can of Duster.
Most problems are due to dust in the sensors or Air Bearings.
If you get a FID1 Error when the drive is switched on and no tape is in it, chances are you can get the drive going by blowing out a couple of Sensors with a can of Duster.

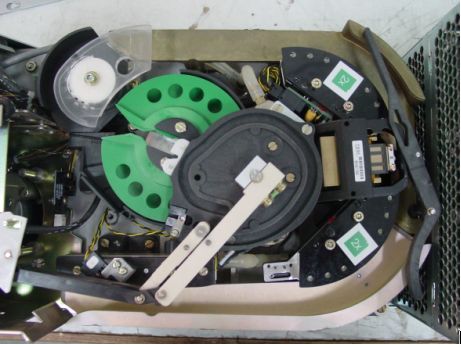
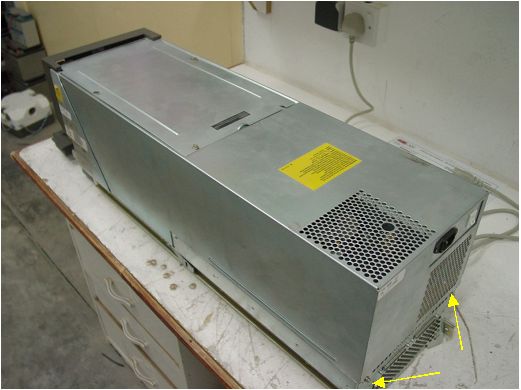
Remove the top cover of the drive by removing the 4 screws indicated and lifting the cover up. This will reveal the Mysterious inner works (who's mystery is only exceeded by it's power - a line from a very bad movie):
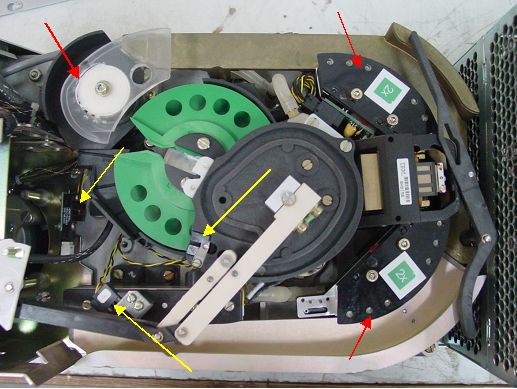
Below are the locations of the most significant Sensors (Yellow) and the Air Bearings (Red). Carefully blow out the sensors and air Bearings and see if the drive works.
Do not use Alcohol swabs on anything as they tend to clog up some of the small holes. Likewise, don't be tempted to clean the head. It won't help.
Do not use Alcohol swabs on anything as they tend to clog up some of the small holes. Likewise, don't be tempted to clean the head. It won't help.
You can verify that the sensors are normal by accessing the diagnostics tools menu from the Front Panel (although it's probably easier to just see if the drive works):
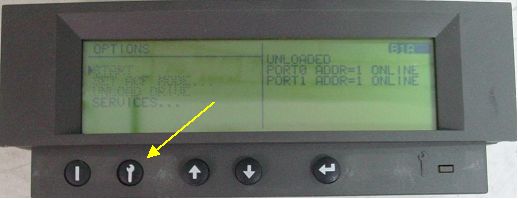
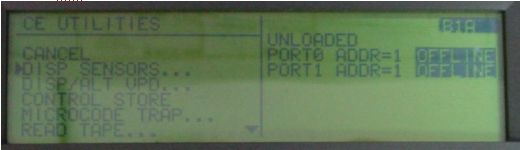
Lift the panel so you can access the hidden buttons and press the indicated one
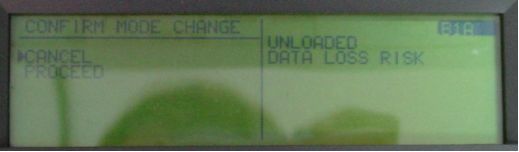
This brings up the following Display, scroll to Proceed and press the Enter Key
This brings up the following Display, scroll to Proceed and press the Enter Key
Scroll to Disp Sensors and press Enter
This is the result, but another Sensor result is hidden, so scroll down
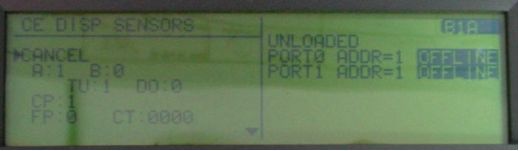
This is the Normal, Good result with no tape in the drive

If more thorough cleaning is required, then the entire cover can be removed:
Remove the 2 screws indicated and pull the cover backwards and up.
This will reveal even more of the mysterious and powerful workings.
This will reveal even more of the mysterious and powerful workings.
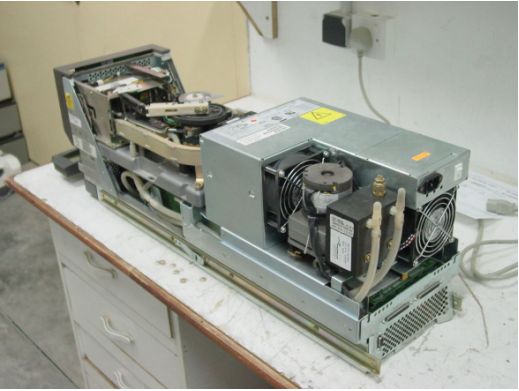
This allows you to blow out the power supply and get better access to the air bearings etc.
One common problem is for a tape to not eject properly. This is due to the loading arm not returning fully:
One common problem is for a tape to not eject properly. This is due to the loading arm not returning fully:
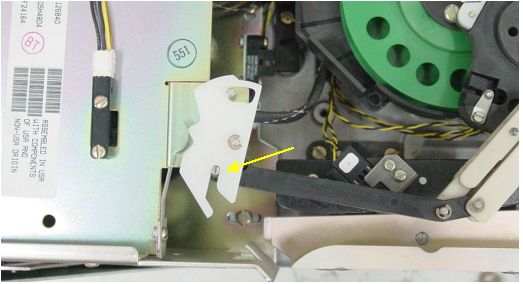
This is the correct position when a tape is unloaded. Note the position of the pin.
Here is the arm when it has not fully returned:
Here is the arm when it has not fully returned:
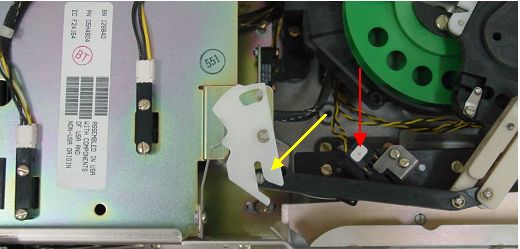
The pin is in the wrong position and plastic detent plate is not locked.
In these cases you can manually move the arm and plate to the correct position and cycle the drive - IE switch it off and on again. That usually fixes the problem.
It is worth blowing out the sensor indicated in red as this might be the cause of the problem. You will have to move the arm out of the way to do this.